
Making OpenBravoPOS work correctly with a STAR TSP143 Ethernet receipt printer
We installed an OpenBravo Point of Sale system for one of our clients last year. Things have been working fairly well for them, except they had a problem with one of their printers going offline every so often. Everything would be going along fine, then suddenly the printer would stop printing orders. The problem is, the kitchen printer isn’t visible from the bar, so nobody would notice for possibly five or ten minutes. The printer would come back online by itself after a while, or the wait staff would be forced to reboot the POS system. Not good. Here’s how we fixed it.
Here’s a quick idea of the setup:
- An ASUS EeeBox EB1012-B0217 (with an Intel Atom N330 CPU and 2GB RAM)
- Windows 7 Home Premium
- OpenBravo version 2.30.1
- An AdvanPOS 15” Touchscreen
This was connected directly (over USB) to the bar printer: an AdvanPOS WP-T800 thermal printer (actually a rebranded WINPOS), which was in turn connected to a ECD-420 cash drawer. (for the uninitiated: cash drawers are actually ‘kicked’ open by the printer, not by the computer! For this to work, the printer has to be sent a special code – this usually coincides with the code to cut the paper.)
There was a second printer in the kitchen, which was also an AdvanPOS WP-T800. However this printer was a long way away, requiring a cable run of about 15 metres. This is beyond USB’s capabilities, so we ran the CAT6 for the cable, and installed the WP-T800 along with a Digitus USB Line Extender. This extender basically routes USB information over the ethernet cable, and converts it back to USB at the other side. It was this printer – running over the USB extender – that was having the trouble.
Obviously the USB extender was our first suspect. To get around using the extender, we ordered a STAR TSP143 receipt printer. These things have a great reputation, with the added bonus that this one is natively ethernet-based. Fortunate, since we already have an ethernet cable sitting there! Because the new printer worked over ethernet, it required it’s own software to get it running. After a little bit of dithering, we got it set up and communicating. However we had a problem.

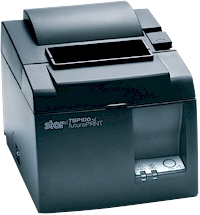
The STAR TSP143 Ethernet receipt printer
With the WP-T800, we simply set OpenBravoPOS to communicate with it as a “serial” printer. This is what you want; it’s plain text, so it doesn’t muck with the control codes. When we first set it up, we’d tried it with the Windows printer drivers, but had some trouble:
- the printer was unable to kick the cash drawer
- the contrast was too light & made the receipt difficult to read
- the printer printed about 4cm of blank paper prior to the actual receipt
I’m sure we could have fixed these problems if we’d tried, but because it’s such a simple device, we didn’t even NEED the printer drivers. We just removed them, then mapped it to COM1, set OpenBravo to print to it as a serial device, and It All Just Worked. Now with the TSP143 this was a different story. We needed to use the Windows drivers in order to set it up over ethernet. So we were back in the Windows-driver boat.
That was all a rather long background into how we found ourself here. Now for the good bit:
How to make the Star TSP143 Ethernet Receipt printer work with OpenBravoPOS under Windows 7, step-by-step:
- Install the Windows drivers that come with the printer. Follow the normal steps until you are able to produce a normal Windows test print to the printer.
- From this point, OpenBravoPOS will be able to see the printer and use it. However you will most likely face the same problems we faced above. If these problems don’t matter to you, you can save yourself a bit of time and hassle by stopping here.
- Find the printer in Windows’ Devices and Printers menu, right-click on it, and open the Printer Properties window. From here, click on the “Share” tab at the top.
- Share the printer; make sure you pick a unique name (generally not a problem), and take a note of the name you’ve shared it as. You need to copy the share name exactly; if you get it ‘almost right’, it won’t work.

The sharing sub-menu when setting printer properties
- Open the command line. Under Windows 7, just open the start menu, type ‘cmd’, right-click on cmd.exe, and cick “Run as Administrator”. This will take you to the command line. If this is your first time here, it might be a little scary.
- What you’re going to do here, is to bind the standard old printer port LPT1 to the network share that the printer is sitting on. Cool! If you already have a printer connected to LPT1, go ahead and use LPT2 throughout this guide instead.
- Type the following:
NET USE LPT1 localhost{your_TSP_printer_share}Note that some guides suggest you use the /persistent:yes switch on the end. You don’t really want this. Explanation below. - While you’re testing this you might get it wrong. If you get an error saying that the share is already mapped, simply run:
NET USE LPT1 /delete
- To test that you’ve got the share mapped properly, type echo test > lpt1 into the command line. You should hear the printer make a noise. It won’t advance the paper out, but if you look, it should have printed “test”. If this works, you can now leave the command line by typing exit.
- Now you want to re-test in a new command line prompt, without running it as administrator. Open cmd.exe again, and type echo test > lpt1. If that works, you’re fine to carry on. If not, there are a couple options:
- Disable UAC
- Use a registry tweak to allow “always run as administrator”
- Run OpenBravoPOS as administrator every single time. (hint: not your best option)
- From here, go back into OpenBravo to test that it’s working. Go into the printer setup screen, and set the printer up as a “star” printer, via File mode, on LPT2.
- Give the printer a test; it should work beautifully! This is almost the end of the guide!
- The last thing we need to do is to get the PC to map the printer automatically when it boots. Normally, we could just map the share with the /persistent switch and be done with it. However, we found that sometimes the system would attempt to map the share before the whole printer subsystem was live and responsive. This would result in a Windows error, saying that it couldn’t map all the network drives, and the printer would then not be available at all. So instead we need to create a script that will run a few seconds after login. This also needs to be run with administrative priviledges. Read on.
- You need to create a blank text file. Open Notepad, and type:
NET USE LPT1 /delete
NET USE LPT1 localhost{your_TSP_printer_share} - Save this file as “printermapping.bat”. You must use the quotes, otherwise Notepad will save the file as “printermapping.bat.txt”, which won’t work. We decided to keep this file on the desktop. This allows the client to easily run it in case anything happens that causes the printer to drop out (again, this needs to run with admin rights – either by right-clicking, or with a registry tweak).
- The final step is to create a task in Windows Task Scheduler that will run this batch file a few seconds after startup. I’ll leave details of how to do this as an exercise for the reader, but remember – you need to make sure that the batch file is run with administrative rights.
And there you have it! Most of this guide is also applicable to Windows XP, but we haven’t tested it. If you do, please let us know how it went. Good luck!
George
October 8, 2011 @ 1:07 am
Great article. i managed to get my ethernet printer to print from OpenBravo. But how did you manage to get the receipt printed on 2 printers at the same time. I have a docket printer and a kitchen printer. Kitchen printer is over ethernet. How can i get Openbravo to print the order on the kitchen printer as well as on the docket printer. both printer used are epson TMT-88V. The docket one is running through parallel port and the Kitchen one through Ethernet.
Thanks.
Eric
October 10, 2011 @ 10:44 am
Hi George,
Thanks for your question! The basic idea is that you don’t want to print them at the same time – you want to print them one after the other. For example:
    ## kitchen printer

    <ticket printer = "2">

       ##  actual ticket code goes in here

    </ticket>
## docket printer
<ticket printer = "2">
## actual ticket code goes in here
</ticket>
This also means you can have your kitchen prints appear with completely different formatting to your docket prints! For example, we’ve done some work so that the kitchen printer doesn’t receive notification about any drinks – because they’re handled at the bar. So the kitchen print simply strips out the drink-related lines entirely. Also it has bigger fonts, no prices, etc.
Does that help? I can give you more detail if you need.
Eric
Radwan
March 8, 2012 @ 9:28 am
Hello Eric,
First Thanks for your interesting article, I have two questions related to openbravo pos
1. How can I enlarge and Bold the characters printed on the Ticket?
2. Is there a way to make the user capable of delivering a number for each Ticket or that the receipt id don’t exceed a given number (100 for example). Make a Modulo may be ?
Saurabh
May 7, 2012 @ 9:15 pm
Hi,
Sorry for asking out of context question. But I want to know if Openbravo POS 2.30 works well on Atom processor. Is there any sluggishness in response?
It will be great if you can help me with this. I am not sure if Atom processor with 2GB is sufficient or not. Since I have budget for only Atom processor, I am stuck up with this query.
Thanks.
Eric
May 8, 2012 @ 12:25 am
Hi Saurabh,
Your question wasn’t out of context at all. 🙂 Yes, we’ve found that OpenBravo POS works perfectly on the Atom processor. We haven’t noticed any particular sluggishness during normal use – reports might take a little longer than on a faster CPU, but that’s different. The normal daily usage works well, nice and fast. Unless you have a very large restaurant, you should be fine. 🙂
Eric