
Installing Linux Mint to a USB drive (Portable OS)
One of the most handy tools to have in IT support is a portable OS. Whether you want to perform a memtest, repair a faulty bootloader, scan for a virus or rootkit, or extract some mistakenly-deleted files from another drive, having a bootable USB drive around makes doing such things quick and easy. So in keeping with that idea, I present to you a step-by-step guide of how to install Linux Mint on a USB drive.
This also works for Ubuntu, Xubuntu, Lubuntu, Ubuntu GNOME, etc.
- First of all you’ll need two USB Sticks – your intended boot stick should be at least 8GB in size; the intended installation stick will be fine with 2GB. I highly recommend using a USB 3.0 drive for your boot stick, to take advantage of the extra speed.
- Download your Linux distro. I’ve gone with Mint 15 (because it’s pretty), and chosen 32 bit for compatibility with other PCs.
- Insert your intended installation stick and put your chosen Linux on to it:
- In Linux, use something like:
sudo dd if=~/Downloads/linuxmint-15-cinnamon-dvd-32bit.iso of=/dev/sdx - Under Windows, use UNetbootin to image your installer to the USB stick.
- In Linux, use something like:
- Once your installation stick is ready, plug in your boot stick.
- Boot your computer onto the installation stick, and select “Install Linux Mint”.
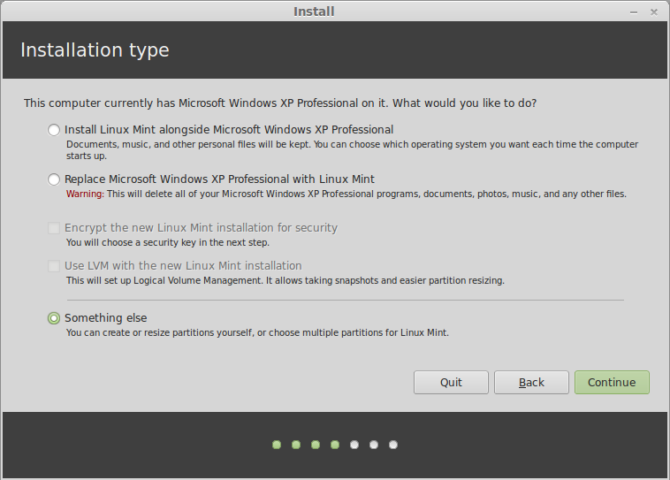
- Follow your nose until you reach the Installation Type screen. At this point, choose ‘Something else’ and click continue:

Warning: be VERY certain of your target. Linux identifies different devices by letter (sda, sdb, sdc) and different partitions by number (sda1, sdd1, sdc2). As you can see below, mine is /dev/sdb.
- Wipe the partition table on your boot stick if required; it should appear as a device containing only free space:

- Select ‘Free Space’ on your boot stick, and add a partition with the following characteristics:
- Size: 512mb or over
- Type: Primary
- Location: I chose beginning; this is up to you
- Use as: Up to you; I went with Ext4
- Mount point: /boot

- Once your boot partition has been created, it’s time to create your encrypted file system. Select ‘Free Space’ on the boot stick again, and create a new partition like so:

- After I took the above screenshot, I decided I wanted an unencrypted space on the drive to allow me to share the drive between Linux and Windows. To achieve this, I actually only used 20GB for this partition. This allowed me to add a FAT32 partition later. You can do this too, if you want.
- Clicking OK will create the new encrypted partition, mount it, and then create an Ext4 partition inside it as /dev/mapper/sdx_crypt. Select this new partition for your installation:

- Make sure that you select the correct device for the boot loader installation! You want to choose your boot stick. Do NOT choose /dev/mapper, use /dev/sdx instead.

- Edit your /dev/mapper/sdx_crypt partition and set a mount point of /.

- Click “Install now”. The installer will alert you that you haven’t provided any swap space. This is fine – click continue.
- Follow your nose through the rest of the installation.
Once the installation is completed, you may want to set up a a swap file if you’re planning to boot on a system with low memory.